Whole Wheat Sandwich Bread
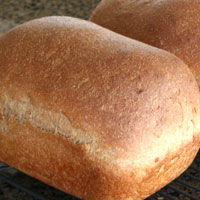
I didn't think it was possible to get homemade 100% whole wheat bread to turn out light, airy, and hold together properly. After many failures with dense and crumbly bread, I finally got it right. I don't buy sandwich bread from the store anymore. This stores well (see tips), is whole grain, and tastes just like a fresh-baked loaf of bread should.
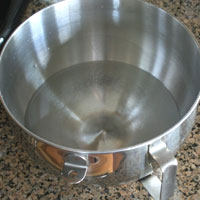
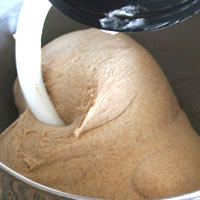
Pour water into the bowl of the electric mixer.
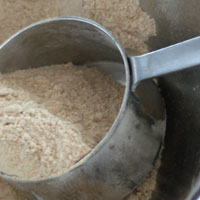
Add the flour and knead 3-4 minutes.
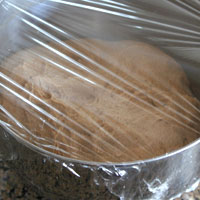
Cover and let sit at least 30 minutes and up to 12 hours.
4 c water (room temperature)
8-10 c (2 lbs 10 oz) whole wheat flour
Letting the wheat flour soak will make better loaves of bread. They will rise higher, be more moist and last longer. Thirty minutes is better than none, but 8-12 hours is preferrable. Letting it sit more than 12 hours can cause problems with the rising, so have 12 be the max.
Add the remaining ingredients and knead 2-3 minutes. It should be cleaning the sides of the bowl by this point. If it isn't, add 2 T wheat flour at a time until it does.
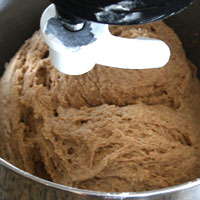
Add flour or water 1-2 tablespoons at a time to get the correct look and feel. Knead an additional 5 minutes.
2 T instant yeast
2 oz (1/2 c) gluten
1/2 c brown sugar
4 t salt
1/4 c vegetable oil
How the dough should
look and feel
-It is just right when it is smooth, soft, and pliable. Also when it does not stick to your fingers, is a bit drier than roll or french bread dough, and when it holds a soft shape.
-It needs more flour if it is sticky, does not clean the sides of the bowl, or cannot hold a shape.
-It has too much flour if it is stiff, looks craggy or rough, or holds a very stiff shape.
-Another test is to roll it with a rolling pin. It should not stick to it or to the work surface, but just barely.
Cover tightly with plastic wrap and let rise 30 minutes in a warm place.
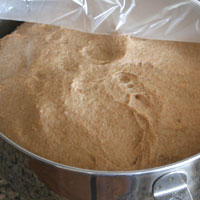
Punch down and knead a minute or so.
Form into a ball and rise another 45-60 minutes.
Because the wheat has been soaking in the water for several hours, the dough will be at room temperature. It is important to let it rise in a warm place or it may not rise at all because it is a heavy dough.
-My favorite heat source for bread is to use a microwavable heat pack. I made one filled with rice. It takes 5 minutes in the microwave and stays warm for an hour or two. I place it under the bowl to help the dough rise.
-A warmed oven works well. Heat it for five minutes or so, then turn the heat off and place the bread in to rise. Be sure the bread is covered with an airtight seal or it will dry out.
-In the winter I place the dough bowl on the fireplace mantel.
-I've heard of people placing the bowl in a warm dryer as well.
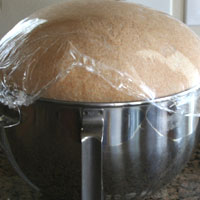
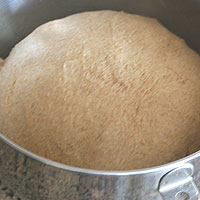
It should triple in size.
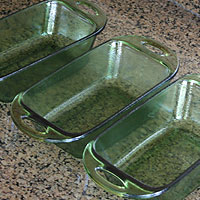
Thouroughly grease three loaf pans with cooking spray. Set aside.

Punch down dough and cut into 3 equal pieces.
A good quality cooking spray works best. It is very frustrating to have your loaves stick to the pan. I have not had good luck using butter, oil, or shortening to grease the pans. If you do use any of these, line the bottom of the pan with parchment paper to ensure a clean release.
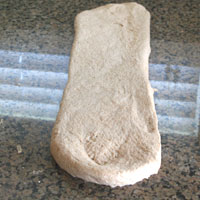
Stretch the first piece as long as you can, then roll it in a long rectangular shape. Push out any airpockets. Cut off any uneven sides and place them in the middle. Roll over it again to incorporate them.
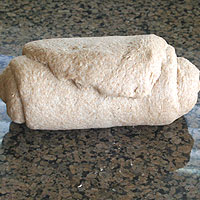
Starting at one end, tightly roll the dough.
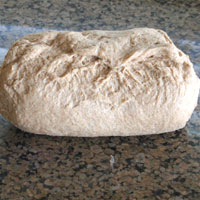
Pinch the bottom to seal the seam. Pinch the sides and bring them down
to the bottom seam to seal the loaf completely.
Airpockets, even small ones can create large holes in the loaves when baked.
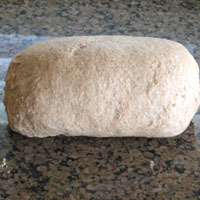
Turn the loaf seam side down and press seam together to form a tight skin on the top.
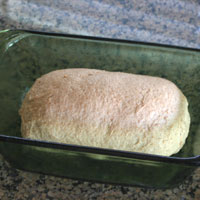
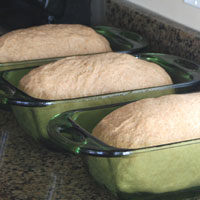
Place in the prepared bread pan. The dough should sit in the middle of the pan and not touch any of the sides.
Repeat with remaining dough.
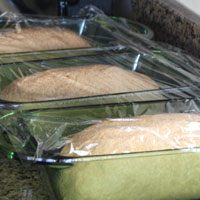
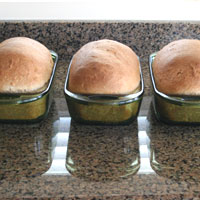
Cover loosely with plastic wrap and rise 45 minutes. Preheat oven to 350.
Remove plastic wrap and rise an additional 15 minutes.
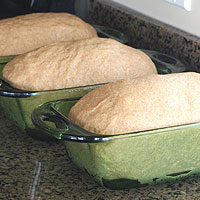
This is how they look after an hour or rising.
Bake 40 minutes. The top should be dark golden brown and hard.
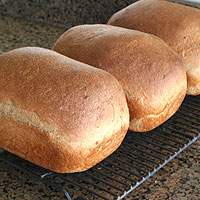
Immediately remove from pans and place on a cooling rack. Eat hot or cool to room temperature before slicing and storing.
Storage tips
Cool completely. Store in plastic bags. You can store the whole loaf or slice and store it. I usually slice all of the loaves, bag them, freeze two of the them, and use one.
They are of course best the first day, but still pretty soft and moist 2-3 days after baking.
To thaw, remove from freezer and let sit at room temperature a few hours. You can remove a few slices and microwave them 20-30 seconds, turning once.
Dough breaking- if the dough breaks while rolling it out, the gluten isn't properly formed. First try soaking the wheat flour longer. Second, make sure it is rising until tripled in size. Also make sure to use gluten in this recipe and not dough enhancer or another substitution.
Not rising- be sure to heat the dough right after needing it. See tips for ways to do this. This dough is very heavy and if the yeast isn't activated early on, it may not rise well.
Top cracking- if the top cracks during the final rise or in the oven, you have too much flour in the dough. Write down what you did and put less next time
Top sinking- if the top sinks during or after baking there is not enough flour in the dough. Write down what you did and put in more next time.
Dense or gummy bread- add more flour the next time. This is a dry dough compared to most yeast doughs.
Whole Wheat Sandwich Bread
Makes 3 medium loaves
4 c water (room temperature)
8-10 c (2 lbs 11 oz) whole wheat flour
2 T instant yeast
2 oz (1/2 c) gluten
1/2 c brown sugar
4 t salt
1/4 c vegetable oil
1. Pour water into the bowl of the electric mixer. Add the flour and knead 3-4 minutes.
Cover and let sit at least (1)30 minutes and up to 12 hours.
2. Add the remaining ingredients and knead 2-3 minutes.
It should be cleaning the sides of the bowl by this point. If it
isn't, add 2 T wheat flour at a time until it does.
Knead about five minutes and touch (2)test the dough. Squeeze the top quickly with a few finger tips. The dough should not stick to them.
Add flour or water 1-2 tablespoons at a time to get the correct look and
feel. Knead an additional 5 minutes.
3. Cover tightly with plastic wrap and rise
in a (3)warm place for 30 min. Punch down and knead a minute or so. Rise another 45-60 minutes. It
should triple in size.
4.
Thouroughly (4)grease three loaf pans with cooking spray. Set aside. Punch down dough and cut into 3 equal pieces.
Stretch the first piece as long as you can, then roll it in a long
rectangular shape. Push out any (5)airpockets. Cut off any
uneven sides and place them in the middle. Roll over it again to
incorporate them. Starting at one end, tightly roll the dough.
Pinch the bottom to seal the seam. Pinch the sides and bring them
down to the bottom seam to seal the loaf completely. Turn the loaf seam side down and press seam together to form a tight skin on the top.
Place in the prepared bread pan. The dough should sit in the middle of the pan and not touch any of the sides.
Repeat with remaining dough. Cover loosely with plastic wrap and
rise 45 minutes.
5. Preheat oven to 350. Remove plastic wrap
and rise an additional 15 minutes. Bake 40 minutes. The top should be dark golden brown and hard.
Immediately remove from pans and place on a cooling rack. Eat hot or
cool to room temperature before slicing and (6)storing.
Notes
1. Letting the wheat
flour soak will make better loaves of bread. They will rise higher, be more
moist and last longer. Thirty minutes is better than none, but 8-12
hours is preferrable. Letting it sit more than 12 hours can cause
problems with the rising, so have 12 be the max.
2.
How the dough should look and feel:
-It is just right when it is smooth, soft, and pliable. Also when it does not stick to your fingers, is a bit drier than roll or french bread dough, and when it holds a soft shape.
-It needs more flour if it is sticky, does not clean the sides of the bowl, or cannot hold a shape.
-It has too much flour if it is stiff, looks craggy or rough, or holds a very stiff shape.
-Another test is to roll it with a rolling pin. It should not stick to it or to the work surface, but just barely.
3. Because the wheat has been soaking in the water
for several hours, the dough will be at room temperature. It is a
heavy dough and may not rise properly if it isn't warmed right after
kneading.
-My favorite heat source for bread is to use a microwavable heat pack.
I made one filled with rice. It takes 5 minutes in the microwave and
stays warm for an hour or two. I place it under the bowl to help the
dough rise.
-A warmed oven works well. Heat it for five minutes or so, then turn
the heat off and place the bread in to rise. Be sure the bread is
covered with an airtight seal or it will dry out.
-In the winter I place the dough bowl on the fireplace mantel.
-I've heard of people placing the bowl in a warm dryer as well.
4. A good quality cooking spray works best. It is
very frustrating to have your loaves stick to the pan. I have not had good
luck using butter, oil, or shortening to grease the pans. If you do use any
of these, line the bottom of the pan with parchment paper to ensure a clean
release.
5. Airpockets, even small ones can create large holes
in the loaves when baked.
6. Storage tips
-Cool completely. Store in plastic bags. You can store the whole loaf or slice and store it. I usually slice all of the loaves, bag them, freeze two of the them, and use one.
-
They are of course best the first day, but still pretty soft and moist 2-3 days after baking.
-To thaw, remove from freezer and let sit at room temperature a few hours. You can remove a few slices and microwave them 20-30 seconds, turning once.