Whole Wheat Sandwich Bread
 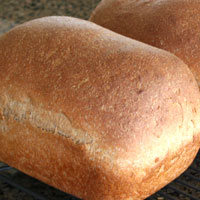 
After many failures I didn't think I could make homemade-100%-whole-wheat bread that was light, airy, and held together properly. I don't know how many dense and crumbly loaves I made before finally getting it right. This bread stores well (see tips), is whole grain, holds together just as well as store bought sandwich bread, and tastes just like a fresh-baked loaf of bread should. |
|
Clarifications!
I apologize for the confusion with the updates. You do not have to soak the wheat flour to make this bread turn out. It works better for me when I do. If you do use the soaking method and have trouble getting the dough to rise because it isn't warm, place a warm heating pad under the bowl. The yeast does not have to soak first or be warm to work. It will however take longer to rise.
The ingredients and porportions are exactly the same for either method.
Let me know if you have questions: [email protected]
|
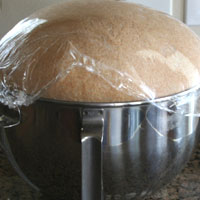
Soaker: Soaking the wheat flour 12-24 hours prior to kneading helps the bread rise about 20% more creating a lighter more airy bread. It takes a bit of planning, but the results are well worth it!
|
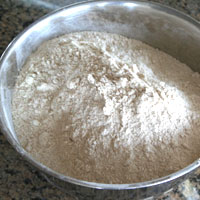
Measure the water and wheat flour. |

|
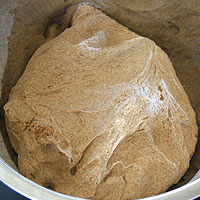
Knead until it comes together (about one minute). Cover with plastic wrap and let sit 12-24 hours at room temperature.
|
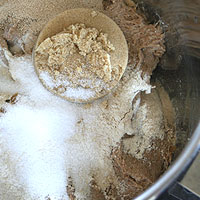
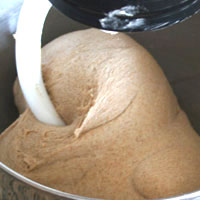
The next day add the remainder of the ingredients. You do not need to hydrate the yeast. Knead 12 minutes. Add (1)flour or water as needed.
|
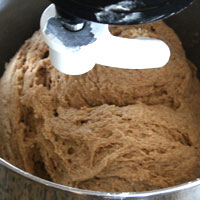
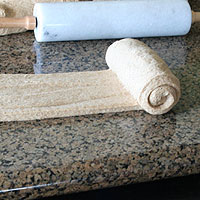
How it looks 2-5 minutes into kneading.
After a minute or two the dough should be cleaning the sides of the bowl. If it is not, add flour 1-2 tablespoons at a time. Squeeze the top quickly with a few finger tips. The dough should not stick to them, but leaves a slight residue.
Add flour or water 1-2 tablespoons at a time to get the correct look and feel.
|
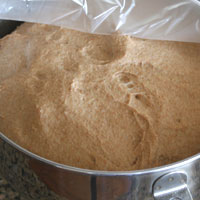
How it looks after 12 minutes of kneading.
|
How the bread should feel and look:
-It is just right when it is smooth, soft, and pliable. Also when it does not stick to your fingers, but leaves a bit of a residue. It is a bit drier than roll or french bread dough, and holds a soft shape.
-It needs more flour if it is sticky, does not clean the sides of the bowl, or cannot hold a shape.
-It has too much flour if it is stiff, looks craggy or rough, or holds a very stiff shape.
-Another test is to roll it with a rolling pin. It should not stick to the work surface, but just barely.
|
Fermenting
|

Cover with plastic wrap and rise 30 minutes. |
Knead 30-60 seconds. |

Cover and rise 60-90 minutes |
It will double or triple in size. |
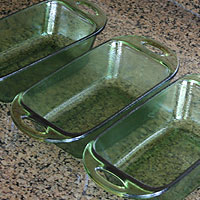
Thouroughly grease three loaf pans with (2)cooking spray. Set aside. |
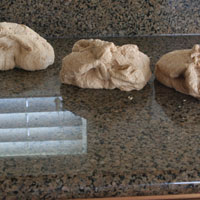
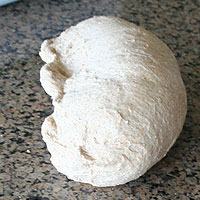
Punch down dough and cut into 3 equal pieces. (3)Working with one piece at a time. |
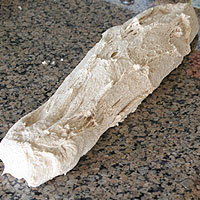
Stretch it gently then roll out with a rolling pin. |
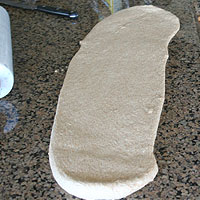
|
Cut excess off sides and place it in the middle. |
You should have a long, narrow piece of dough.
|
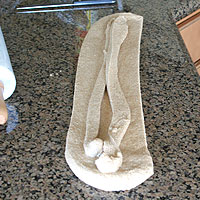
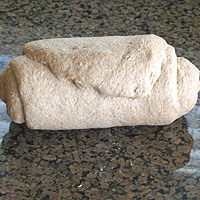
Roll tight. |
|
Pinch the sides and stretch them down into the seam. |
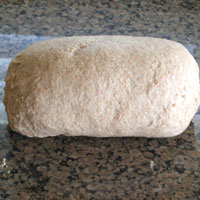
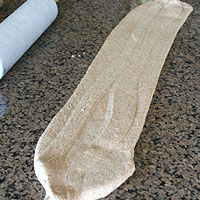
Place the dough seam side down and check to make sure the dough is smooth and tight on top. |

Place in well greased pans. The dough should sit in the middle of the pan and not touch any of the sides. |
Proofing
|
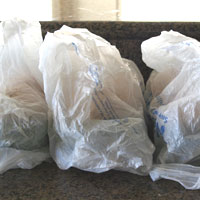
Cover with plastic bags rise 60 minutes. Preheat oven to 350 at 15-20 minutes before baking. |
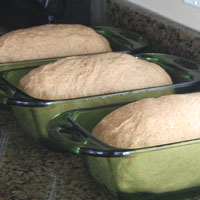
How they look at 30 minutes proofing. |

This is how they look after an hour or rising. |
Baking
|
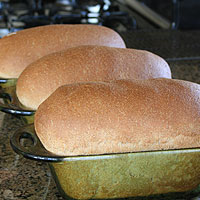
Bake 40 minutes. The top should be dark golden brown and hard.
|
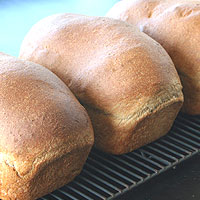
Remove from oven and run a knife around the sides to release from the pan and let cool on a cooling rack. Do not leave loaves in the pan to cool, it will not cool properly.
|
Cool at least ten minutes before slicing. However it is best to slice it when completely cool. |
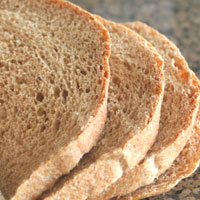
Storing
Storage tips
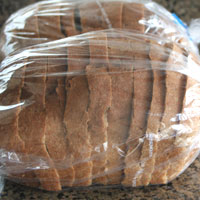
-Cool completely. Store in plastic bags. You can store the whole loaf or slice and store it. I usually slice all of the loaves, bag them, freeze two of the them, and use one.
-To thaw, remove from freezer and let sit at room temperature a few hours. You can remove a few slices and microwave them 20-30 seconds, turning once.
-
They are of course best the first day, but still pretty soft and moist 2-3 days after baking when kept at room temperature. |
Problems:
Coming soon! |
Variations:
Coming soon! |
Whole Wheat Sandwich Bread
Makes 3 medium loaves
4 c (32 oz) hot water
2 lbs 10 oz (7-9 c) whole wheat flour
2 T instant yeast (you can use active dry, but add ½ t)
2 oz (1/2 c) gluten (optional, but really improves the texture) (if you don’t use add 1/3 c (2 oz)
wheat flour instead)
1/2 c brown sugar (you can use white, but the bread won't be as soft or as good the next
day)
4 t salt
1/4 c vegetable oil
Soaker
Measure the water and wheat. Knead until it comes together (about one minute). Cover with plastic wrap and let sit 12-24 hours at room temperature.
Dough
The next day add the remainder of the ingredients. You do not need to hydrate the yeast. Knead 12 minutes. Add (1)flour or water as needed.
After a minute or two the dough should be cleaning the sides of the bowl. If it is not, add flour 1-2 tablespoons at a time. Squeeze the top quickly with a few finger tips. The dough should not stick to them, but leaves a slight residue.
Add flour or water 1-2 tablespoons at a time to get the correct look and feel. Knead 10-12 minutes.
How the bread should feel and look:
-It is just right when it is smooth, soft, and pliable. Also when it does not stick to your fingers, but leaves a slight residue. It is a bit drier than roll or french bread dough, and holds a soft shape.
-It needs more flour if it is sticky, does not clean the sides of the bowl, or cannot hold a shape.
-It has too much flour if it is stiff, looks craggy or rough, or holds a very stiff shape.
-Another test is to roll it with a rolling pin. It should not stick to it or to the work surface, but just barely.
Fermenting
Cover and rise 30 minutes. Knead 30-60 seconds. Cover and rise 60-90 minutes.
Proofing
Thouroughly grease three loaf pans with (2)cooking spray. Set aside. Punch down dough and cut into 3 equal pieces. (3)Working with one piece at a time. Stretch it gently then roll out with a rolling pin. Cut excess off sides and place it in the middle. You should have a long, narrow piece of dough. Roll tight. Pinch the seam. Pinch the sides and stretch them down into the seam. Place the dough seam side down and check to make sure the dough is smooth and tight on top. Place in well greased pans. The dough should sit in the middle of the pan and not touch any of the sides. Cover with plastic bags rise 60 minutes. Preheat oven to 350 at 15-20 minutes before baking.
Baking
Bake 40 minutes. The top should be dark golden brown and hard. Remove from oven and run a knife around the sides to release from the pan and let cool on a cooling rack. Do not leave loaves in the pan to cool, it will not cool properly. Cool at least ten minutes before slicing. It is easiest to slice when completely cool.
Tips
Soaking the wheat 12-24 hours prior to kneading helps the bread rise about 20% more creating a lighter more airy bread. It takes a bit of planning, but the results are well worth it!
The vacuum packed packages of yeast seem to work the best. Refrigerate the leftover yeast, don't freeze, it will loose some of it's strength. I have heard a lot of complaints about the individual packets.
After forming the loaves you can enclose them in a plastic bag and refrigerate 2-3 days. Pull them out 60 minutes or so before baking. They will not rise as high as a loaf that had not been refrigerated, but will still be good.
Storage tips
-Cool completely. Store in plastic bags. You can store the whole loaf or slice and store it. I usually slice all of the loaves, bag them, freeze two of the them, and use one.
-
They are of course best the first day, but still pretty soft and moist 2-3 days after baking.
-To thaw, remove from freezer and let sit at room temperature a few hours. You can remove a few slices and microwave them 20-30 seconds, turning once.
Notes
1. It is easier to add flour to a sticky dough, than water to a stiff dough, so it is best not to mix in all of the flour at this point. If you are weighing it, you will know exactly how much it needs and can add it all.
2. A good quality cooking spray works best. It is very frustrating to have your loaves stick to the pan. I have not had good luck using butter, oil, or shortening to grease the pans. If you do use any of these, line the bottom of the pan with parchment paper to ensure a clean release.
3. You should not have to grease or flour the work surface. If the dough has the right amount of flour it should not stick, but just barely.
|
|
|
|