|
||||||||||||||||||||
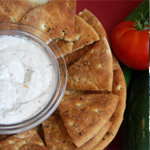
Ciabatta is about the most perfect bread in the world. A creamy, soft, springy crumb, surrounded by a thin, crisp crust. It's worth the work, and work it is! Schedule |
||||
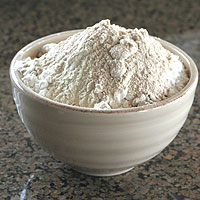
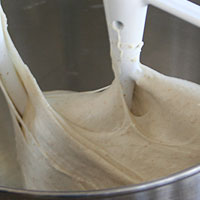
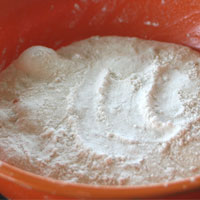
Combine all ingredients.
|
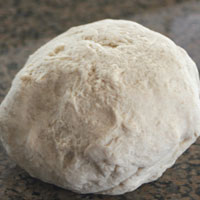
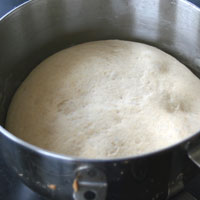
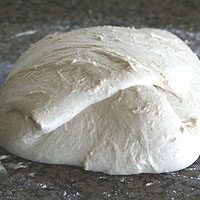
Knead for 5 minutes. The dough will be very stiff. Place in a bowl. Cover with plastic wrap and ferment 6 hours at room temperature. |
This is how the biga should look after fermenting. |
||
4 loaves 4 c (1 lb 4.8 oz) all purpose flour 1 T (.4 oz) gluten 1/3 c (2 oz) coarsely wheat flour 1/2 t instant yeast 1 2/3 c (13 oz) cold water 8 loaves 8 c (2 lbs 9.6 oz) 2 T (.8 oz) gluten 2/3 c (4 oz) coarsely ground wheat 1 t instant yeast 3 1/3 c (1 lb 10 oz) cold water |
||||
|
|
|
||
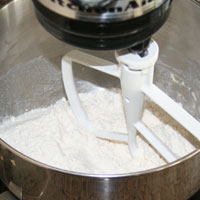
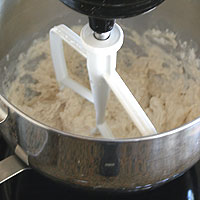
| With the paddle attachment of a stand mixer combine flour, yeast, and salt on low. | Add water in a steady stream. | Break the biga apart in about eight pieces and add to the dough one at a time a few seconds apart. Turn the speed to medium and mix five minutes. | ||
4 loaves 4 1/2 - 4 2/3 c (1 lb 7 oz) all purpose flour 2 t instant yeast 4 1/2 t salt 3 c (1 lb 8.2 oz) cold water fermented biga (all of it) 8 loaves 9 - 9 1/2 c ( 2 lb 14 oz) all purpose flour 4 t instant yeast 9 t salt 6 c (3 lb .4 oz) cold water fermented biga (all of it) If the water is warm the bread will rise too quickly the first day and deflate when it is shaped the next day. |
||||
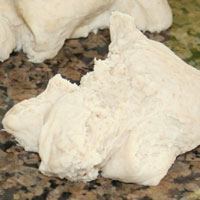
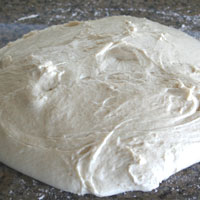
The dough should now be smooth and gloppy (very sticky and unable to hold it's shape). Cover the bowl with plastic wrap and wait 20 minutes. |
|
|||
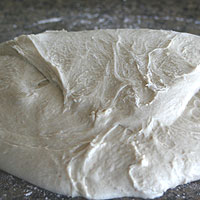
Handle the dough very gently to preserve the air pockets. |
Gently fold the top quarter to the middle. |
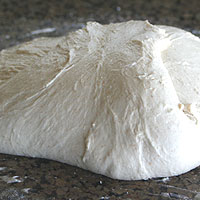
Overlap the first fold by folding the right in. |
||
Overlap the first two folds by folding the bottom over them. |
Overlap the first three folds by folding the left over them. |
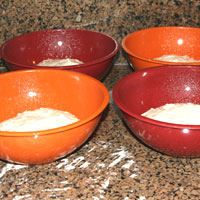
Cut the dough into four equal pieces for the small recipe, eight pieces for the large. Do the final turn with each piece. Place each piece in its prepared bowl. Cover with plastic wrap and refrigerate overnight. |
||
A soft dough like this needs to be handled delicately. Folding or turning the dough is a gentler way to develope the gluten than kneading it. I used to refrigerate all of the dough in one bowl, but it was difficult to cut, weigh, and not deflate when working with it the next day. Refrigerating it in seperate bowls works so much better. It is easier to divide into equal pieces, and most importantly the dough is much less likely to deflate. I have tried forming the loaves then refrigerating overnight like I do with french bread, but it doesn't work with the ciabatta. The airpockets rose to the top, so there was a big airpocket in the top and dense bread underneath. Refrigerating in seperate bowls, then shaping as described has been a fool-proof method for me. |
||||
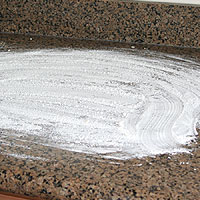
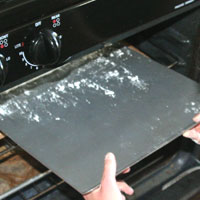
Prepare the work surface by lightly spraying the counter with cooking spray and coating thouroughly with flour. Set 1/2 c of flour next to you in case you need more.
|
Prepare two paper towels by thoroughly covering them with flour. |
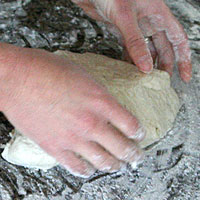
Remove two bowls from the refrigerator and sprinkle the tops with flour. Loosen the sides, then gently release the dough from the bowl onto the prepared counter. |
||
Fold the top third down and the bottom third up lengthwise, like a business letter except lengthwise. |
Gently seal by pressing the bottom fold onto the new top with your fingertips. |
|
||
If the dough is folded like a business letter widthwise, it is too heavy for the dough and deflates the air pockets. |
||||
Coat lightly with flour.
|
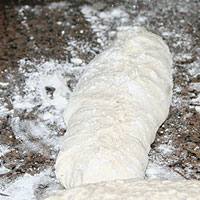
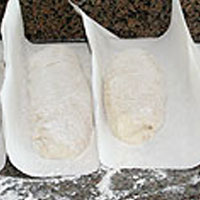
Place seam side down on prepared paper towels. |
Place loaves side by side leaving room for them to expand. Bring the sides of the paper towel upright by the loaves. |
||
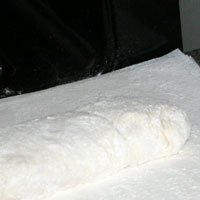
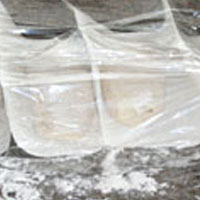
Cover loosely with another paper towel or plastic wrap and proof 1-2 hours. Remove the second two loaves from the refrigerator 40-50 minutes after shaping the first two. Repeat the shaping process with these loaves. |
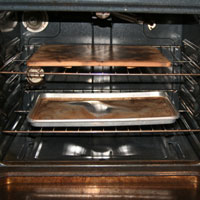
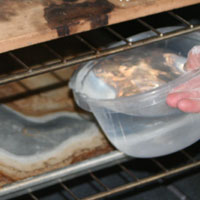
Prepare the oven 30-60 minutes after shaping the first loaves. Place one oven rack second to the top and another on the bottom setting. Place a baking stone on the top rack and a steam pan on the bottom. Preheat to 500 degrees. |
|
||
The proofing time depends on the temperature of your house. In a cold house, the dough may take twice as long to rise. Heat the oven 50 degrees higher than the final baking temperature. Heat is lost when sliding the loaves in. Don't forget to set the timer for 3 minutes so you don't forget to turn the temperature down. Most ovens take about 30 minutes to get to 500 degrees, it will probably tell you it's ready after 15, but mine is sometimes 150 degrees too cold at that point. |
||||
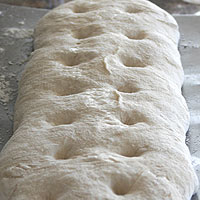
The bread is ready when it looks fully expanded. Touch is gently, it should feel light and soft. Place 2 cups hot water next to the oven. |
Quickly and carefully lift one paper towel onto a floured peel and lift to roll the dough seam side up on the peel. Stretch the loaves a bit shorter than the length of your baking stone. If the loaves are too short the holes will not develop properly because it will be too heavy.
|
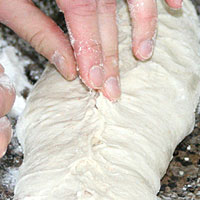
Dimple the dough by pressing with your first and second fingers all the way down the loaf. Press to the bottom but don’t break the skin. This distributes the air pockets and prevents huge pockets from taking over. |
||
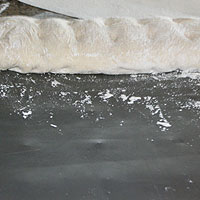
Make sure it is not stuck to the peel. If it is slide more flour under it. |
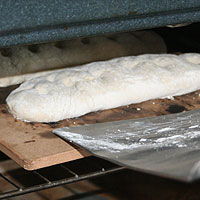
Slide onto the stone and shut the oven. |
Quickly repeat with a second loaf (it only takes 10 seconds or so) and slide onto the stone. |
||
Pour 1-2 cups hot water into the hot steam pan. Close the oven. |
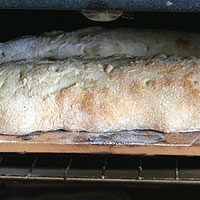
Bake 3 minutes then lower the temperature to 450.
Bake 12 more minutes then rotate the loaves 180 degrees and move the loaf in the back to the front. |
Bake another 15-20 minutes. Check them. They should be golden brown. Turn the oven down to 350 and let them sit on the stone an additional 8-10 minutes. Remove to a cooling rack. Reheat the oven to 500 and repeat with the remaining two loaves. | ||
The steam pan provides adequate steam. I used to spray the loaves with water at 1 minute intervals the first few minutes of baking. I found that the loss of heat wasn't worth the extra steam. Most baked goods are baked until they are just done. Bread is different, it should be baked until just before it starts to burn. Underbaked bread is gummy. Leaving it on the hot stone at a lower temperature helps it bake a little longer without burning it. |
||||
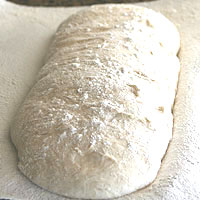
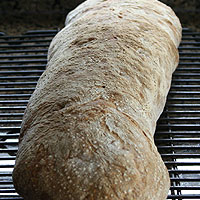
Remove to a cooling rack and cool completely. About 2 hours.
|
Slice and enjoy! |
|
||
| Cool the bread completely before slicing. The bread continues to bake as it cools. Cutting it early stops this process by releasing steam. It will also gum up the loaf. |
||||
|
Storage tips Store it the day it's made- Let cool completely. Cover with cloth or in paper lunch bags. It usually fits in two bags. (One on one end the other on the other end.) Slice right before serving. Directions for freezing and thawing |
||||
Problems |
||||
| Ciabatta This bread is a lot of work, but well worth it. It is so so good. Most of the work can be done the day before baking. The most important thing in working with the dough is to handle it gently but meaningfully. Schedule The dough should not be refrigerated for more than 12 hours or it is more likely to deflate when it's removed from the bowl. A good schedule is: 12:00 (noon) start the biga 6:00 p.m. start the final dough 7:30 p.m. refrigerate dough 7:30 a.m. remove dough from refrigerator and finish |
||||
|
Biga 4 loaves 4 c (1 lb 4.8 oz) unbleached all purpose flour 1 T (.4 oz) gluten 1/3 c (2 oz) course ground wheat flour 1/2 t instant yeast 1 1/2 c (13 oz) cold water |
Biga 8 loaves 8 c (2 lbs 9.6 oz) 2 T (.8 oz) gluten 2/3 c (4 oz) coarsely ground wheat 1 t instant yeast 3 1/3 c (1 lb 10 oz) cold water |
|||
Combine all ingredients and knead for 5 minutes. The dough will be very stiff. Cover with plastic wrap and ferment 6 hours at room temperature. |
||||
| Final Dough 4 loaves 4 1/2 - 4 2/3 c (23 oz) all purpose flour 2 t (.2 oz) instant yeast 4 1/2 t salt 3 c (24.2 oz) cold water. fermented biga (all of it) |
Final Dough 8 loaves 9 - 9 1/2 c ( 2 lb 14 oz) all purpose flour 4 t instant yeast 9 t salt 6 c (3 lb .4 oz) cold water fermented biga (all of it) |
|||
|
6. Remove the second two loaves from the refrigerator 40-50 minutes after shaping the first two. Repeat the shaping process with these loaves. 7. Prepare the oven
(6)30-60 minutes after shaping the first loaves. Place one oven rack second to the top and another on the bottom setting. Place a baking stone on the top rack and a steam pan on the bottom. Preheat to
(7)500 degrees. 9. Remove to a cooling rack. Reheat the oven to 500 and repeat with the remaining two loaves. They will proof longer than the first two, but I haven't had a problem with this. (10)Cool the loaves completely before slicing, about 2 hours. Notes 8. The steam pan provides adequate steam. I used to spray the loaves with water at 1 minute intervals the first few minutes of baking. I found that the loss of heat wasn’t worth the extra steam. |
||||


Recipes