Wheat Berry French Bread
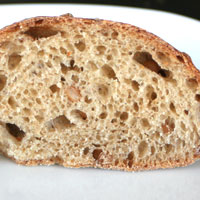
A nutty tasting partial-wheat french bread. It's light and airy with a wonderful natural sweetness.
|
Wheat Berries
|
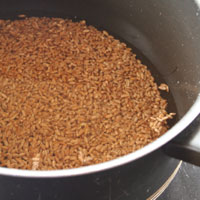
In a large pot add 1 c wheat berries (uncooked wheat). Add 6 cups water and bring to a boil. Cover and reduce heat to a simmer 1 1/2-2 hours, until the wheat is cooked all the way through. |
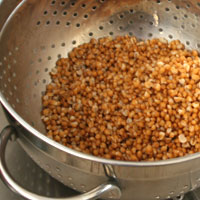
Drain and rinse with cold water. Set 1/2 c (4 oz) aside to use in the bread. Make sure they are cool before adding to the dough. |
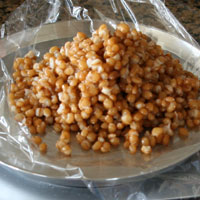
Measure and store the rest in 1/2 c increments in the freezer for later use. |
|
|
|
Dough
|
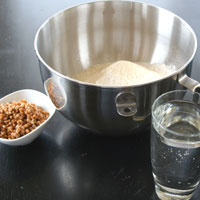
In a large bowl or the bowl of your stand mixer, mix the dry ingredients (the first six). Don't add all of the flour unless you are weighing it. If you're using a stand mixer, use the dough hook and turn it on to the lowest setting. Slowly add the water. |
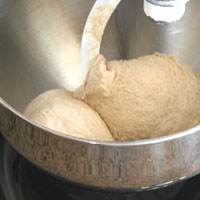
Knead on the second lowest speed for 8 minutes. Check the dough after 5 minutes. It should be tacky. This is the point JUST after sticky. To test it touch it firmly with 3-4 fingers and pull away quickly. Your fingers should be clean, but just barely. It should not feel (4)dry or stiff. If it is sticky add more flour 2 T (.5 oz) at a time. If it is dry and stiff add water 1 T (.5 oz) at a time. Adding water may take some kneading by hand until it's incorporated or it will splash out of the bowl. |
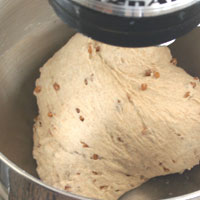
Add the (5)wheat berries and knead 2-4 minutes longer. You may have to knead them by hand at first to incorporate them. |
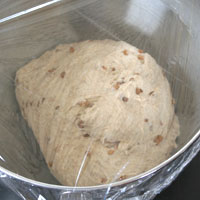
Form into a ball in a bowl. Cover with plastic wrap and rise (6)30 minutes.
It will not show signs of rising by this point. Knead for 30 seconds. Reform into a ball and cover with plastic wrap again. Rise 60 minutes. |
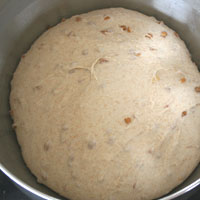
It should be about 1 ½ times it’s original size. Don’t let it rise more than this, it is more likely to deflate later if it rises too much even at this point. |
|
| |
|
|
Shaping
|
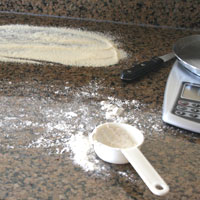
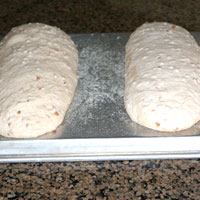
Pour flour, cornmeal, or semolina on the your work surface and on an inverted cookie sheet. Set aside.
|
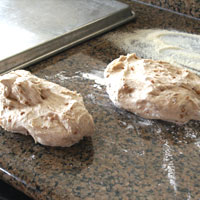
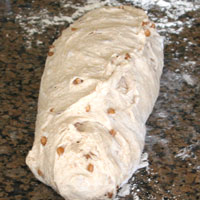
Gently remove the dough from the bowl. Handle it gently so the air pockets won't get pushed out. Divide the dough in half. Let one piece rest while you form the first. |
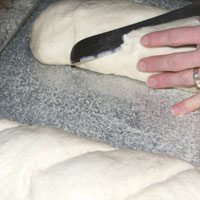
Fold the bottom third up and the top third down like you are folding a business letter. |
|
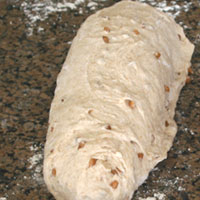
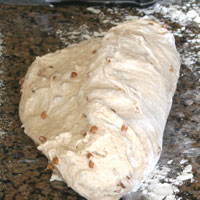
Using your thumbs press the bottom fold down sealing it with the rest of the dough. Wrap the ends in and seal down to the bottom as well. |
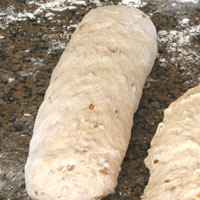
Roll the dough so the seam is on the bottom and gently rock the dough back and forth starting from the middle stretching it to the desired length. Pinch the seam while doing this as well to have a tight and even "skin". If there are large air pockets that rise to the surface gently pop them. If you don't you may end up with very large air pockets on the surface which can deflate the dough if disturbed right before baking or the crust will pull away from the dough in the oven leaving you with a huge air pocket.
|
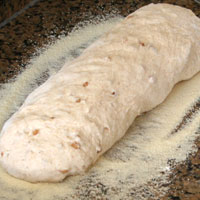
Place the dough in the prepared semonlina and coat bottom completely. |

Place on the prepared sheet.
|
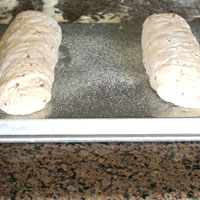
Repeat the above process with the remaining dough. |
Proofing
|
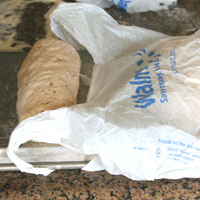
Cover the cookie sheet with plastic wrap or two plastic grocery bags. |
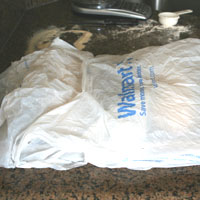
Refrigerate overnight. The dough can be held up to two nights in the refrigerator before baking. Do not freeze the dough, it kills some of the yeast and the rise will not be as high as it could be. |
|
Baking
|
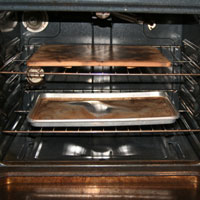
The next day prepare the oven. Position the top rack on the second to highest setting. Position the bottom rack to the lowest setting. Remove any other racks. Place the baking stone in the center of the high rack. Place a steam pan on the low rack. Do not use a glass container for this!!!! It will shatter when you pour the water in it! I use a jelly roll pan, but doing this will warp the pan.
Preheat the oven to 500 with the stone and steam pan positioned correctly inside 45-60 minutes before baking. It will take most ovens this long to heat even if it registers as ready. When my oven says it is ready at 500 it is actually at 300. This of course will ruin your bread.
|
Remove the dough from the refrigerator. |
Gently place it on a peel dusted with semolina, cornmeal, or flour. |
Get one cup of hot water and set it near the oven. |
(White bread pictured here)
Score each loaf three times in a diagonal direction at a 45 degree angle about 1/2 inch deep. Make sure the loaves are not stuck on the peel. If they are sticking gently lift the loaf and put more semolina, cornmeal, or flour underneath it. Working quickly, slide the loaves onto the hot stone and pour the cup of water into the steam pan. Quickly shut the oven. Wait 2 minutes and turn the oven down to 450 degrees. Bake for 13 minutes more, turn the loaves 180 degrees and bake another 8-10 minutes. Check the loaves. |

They should be a rich brown color, if they are starting to blacken (which they probably aren't) remove from the oven and place on cooling racks. If they are dark brown, turn the oven off and keep the bread in for another 5-10 minutes. Artisan breads should be baked as long as they can be without burning them. It makes the crust crisper and the inside drier (desireable) as opposed to gummy.
Remove from the oven and place on a cooling rack to cool. The bread will continue to bake while it sits. |
Wait 2 hours before slicing and serving the bread. If you cut into it before it will become gummy and the taste won't be quite right.
Eat the bread the same day it is baked. If you don't you can freeze it.
|
|
|
Problems
Refer to French Bread problems for problems.
Wheat-Berries: if the wheat-berries are added at the beginning of the kneading they will break apart making them look messy, and they will release too much starch into the bread.
Water Temperature: cold water is very important in this recipe. You want a very slow rise. If it rises to fast it will have large air pockets and deflate when you bake it. |
Wheat-Berry French Bread
Wheat-Berries
1 c wheat
6 c water
Bread
3 1/3 c (16.4 oz) all purpose flour
1 c (6 oz) wheat flour
2 T (.6 oz) gluten (1)
1 ½ t instant yeast (2)
2 t salt
½ t diastatic malt powder or brown sugar
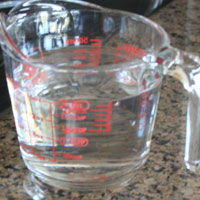
2 c (15.7 oz) cold water (3)
½ c (4 oz) boiled wheat berries (from above)
Wheat-Berries
In a large pot add 1 c wheat berries (uncooked wheat). Add 6 cups water and bring to a boil. Cover and reduce heat to a simmer 1 1/2-2 hours, until the wheat is cooked all the way through. Drain and rinse with cold water. Set 1/2 c (4 oz) aside to use in the bread. Make sure they are cool before adding to the dough. Measure and store the rest in 1/2 c increments in the freezer for later use.
Kneading
In a large bowl or the bowl of your stand mixer, mix the dry ingredients (the first six). Don't add all of the flour unless you are weighing it. If you're using a stand mixer, use the dough hook and turn it on to the lowest setting. Slowly add the water. Knead on the second lowest speed for 8 minutes. Check the dough after 5 minutes. It should be tacky. This is the point JUST after sticky. To test it touch it firmly with 3-4 fingers and pull away quickly. Your fingers should be clean, but just barely. It should not feel (4)dry or stiff. If it is sticky add more flour 2 T (.5 oz) at a time. If it is dry and stiff add water 1 T (.5 oz) at a time. Adding water may take some kneading by hand until it's incorporated or it will splash out of the bowl. Add the (5)wheat berries and knead 2-4 minutes longer. You may have to knead them by hand at first to incorporate them.
Fermenting
Form into a ball in a bowl (I just use the same bowl). Cover with plastic wrap and rise (6)30 minutes. It will not show signs of rising by this point. Knead for 30 seconds. Reform into a ball and cover with plastic wrap again. Rise 60 minutes. It should be about 1 ½ times it’s original size. Don’t let it rise more than this, it is more likely to deflate later if it rises too much even at this point.
Shaping
Pour flour, cornmeal, or semolina on the your work surface and on a inverted cookie sheet. Set aside. Gently remove the dough from the bowl. Handle it gently so the air pockets won't get pushed out. Divide the dough in half. Let one piece rest while you form the first. Fold the bottom third up and the top third down like you are folding a business letter. Using your thumbs press the bottom fold down sealing it with the rest of the dough. Wrap the ends in and seal down to the bottom as well. Roll the dough so the seam is on the bottom and gently rock the dough back and forth starting from the middle stretching it to the desired length. Pinch the seam while doing this as well to have a tight and even "skin". If there are large air pockets that rise to the surface gently pop them. If you don't you may end up with very large air pockets on the surface which can deflate the dough if disturbed right before baking or the crust will pull away from the dough in the oven leaving you with a huge air pocket.
Place the dough in the prepared semonlina and coat bottom completely. Repeat the above process with the remaining dough.
Proofing
Cover the cookie sheet with plastic wrap or two plastic grocery bags. Refrigerate overnight. The dough can be held up to two nights in the refrigerator before baking. Do not freeze the dough, it kills some of the yeast and the rise will not be as high as it could be.
Baking
The next day remove the dough from the refrigerator and gently place on a peel dusted with semolina, cornmeal, or flour. Let it sit uncovered 30 minutes at room temperature. Check it occasionally to make sure it's not sticking to the peel.. If it is place some semonlia or flour on the sticky spot.
Prepare the oven. Position the top rack on the second to highest setting. Position the bottom rack to the lowest setting. Remove any other racks. Place the baking stone in the center of the high rack. Place a steam pan on the low rack. Do not use a glass container for this!!!! It will shatter when you pour the water in it! I use a jelly roll pan, but doing this will warp the pan.
Preheat the oven to 500 with the stone and steam pan positioned correctly inside 45-60 minutes before baking. It will take most ovens this long to heat even if it registers as ready. When my oven says it is ready at 500 it is actually at 300. This of course will ruin your bread.
Get 1-2 cups of hot water and set it near the oven. Score each loaf three times in a diagonal direction at a 45 degree angle about 1/2 inch deep. Make sure the loaves are not stuck on the peel. If they are sticking gently lift the loaf and put more semolina, cornmeal, or flour underneath it. Working quickly, slide the loaves onto the hot stone and pour the cup of water into the steam pan. Quickly shut the oven. Wait 2 minutes and turn the oven down to 450 degrees. Bake for 13 minutes more, turn the loaves 180 degrees and bake another 8-10 minutes. Check the loaves. They should be a rich brown color, if they are starting to blacken (which they probably aren't) remove from the oven and place on cooling racks. If they are dark brown, turn the oven off and keep the bread in for another 5-10 minutes. Artisan breads should be baked as long as they can be without burning them. It makes the crust crisper and the inside drier (desireable) as opposed to gummy.
Remove from the oven and place on a cooling rack to cool. The bread will continue to bake while it sits.
Wait 2 hours before slicing and serving the bread. If you cut into it before it will become gummy and the taste won't be quite right.
Eat the bread the same day it is baked. If you don't you can freeze it.
Storing
Directions for freezing and thawing: Wrap a whole loaf or sliced pieces tightly in plastic wrap. Freeze
To thaw a whole loaf: remove from the freezer several hours before using. Remove the plastic wrap and set at room temperature. 30 minutes before slicing place in a 350 degree oven for 10 minutes to crisp the crust. Remove and let cool 20 minutes or until cooled. Slice and serve.
To quick thaw a whole loaf: preheat the oven to 350. Remove from the freezer and take off the plastic wrap. Thaw in the microwave 1-2 minutes until thawed through. Place in the oven for 10 minutes to crisp the crust. Remove and let cool 20 minutes or until cooled. Slice and serve.
To thaw slices of bread: remove from the freezer and let sit covered at room temperature 1-2 hours.
To quick thaw slices of bread: Place in microwave 30 seconds or until thawed.
The crust will not be crisp on the presliced frozen pieces, but the bread will still be great!
**Everything I have read about baking bread says to take it out of the refrigerator 1-2 hours before baking. I have not had good luck with this. When I take them out an hour in advance they deflate too easily when transfered to the peel because the dough is softer. Instead, I place them on my peel straight from the refrigerator and slide them onto the stone. The bread has a beautiful rise and the inside isn't gummy (which could be a problem if the outside was baking fast and the inside was too cold). Maybe you'll have better luck letting it sit at room temperature for an hour, but I don't, so I go ahead and bake them.
Notes
1. Gluten is what holds bread together, and gives it a better rise.
2. Instant yeast uptakes water more quickly so it doesn't need to be hydrated first. You can use active-dry yeast, but add 1/8 t and hydrate 5-10 minutes in the water first.
3. Cold water is very important in this recipe. You want a very slow rise. If it rises to fast it will have large air pockets and deflate when you bake it.
4. A loaf with too little flour will not hold it's shape and will bake flat. A loaf with too much flour will be dense and dry.
5. If the wheat-berries are added at the beginning of the kneading they will break apart making them look messy, and they will release too much starch into the bread.
6. This rest period followed by kneading (autolyse) is good for the gluten development without over-working the dough.
|