|
||||||||||||||||||||
|
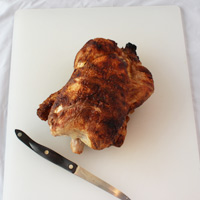
How To: De-boning a Rotisserie Chicken
The first time I roasted a whole chicken I invited a bunch of family members over for sunday dinner. Let's just say it wasn't my finest moment. Two hours after everyone arrived we finally sat down to eat. You see, my meat thermometer said it was done. My taste buds said it was done, but no one believed me. I had grand central station in my kitchen while everyone lined up for a look at that bird. So this is the very first rule to live by when serving a chicken: Never let anyone see it before you serve it! I swear that poor bird was incinerated and still looked "pink" down in it's inner folds. Give the chicken a little privacy people. Now secondly, and I believe this rule really defines the chicken movement, just buy a rotisserie chicken already! Then you don't need to bother with a meat thermometer at all. Save that story for your turkey. And here's the thing-once you learn how to present a rotisserie, it's got glam like no other meal. Here's what a rotisserie has going for it: It's affordable, stylish, and a crowd pleaser. Now, whether you decide to make your own or buy one, let me show you how to get that sucker de-boned. |
||||||||
|
|
||||||||
 |
 |
 |
||||||
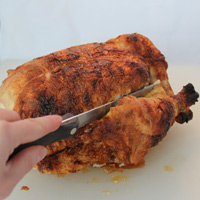
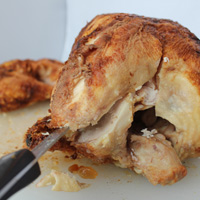
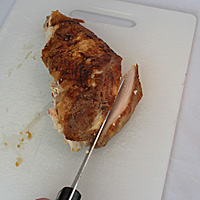
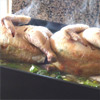
| Start with a whole rotisserie chicken and a serrated knife. | Find the space in between the leg and breast. Cut straight down. | Pull the legs down and twist to pull them off. | ||||||
 |
 |
 |
||||||
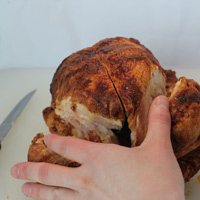
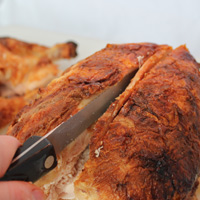
| Set these two leg pieces aside until you are ready to serve. | Cut down the
middle to split the two breasts. Let's start with just one side and remove the breast meat: |
Take you knife and run it down from the center cut. Trace the breast all the way around, cutting as you go. Stop when you meet the center line again on the other side. | ||||||
 |
 |
 |
||||||
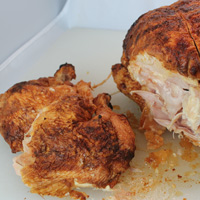
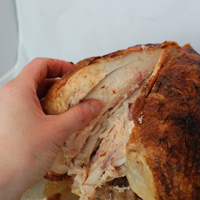
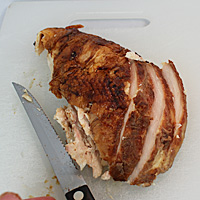
| Now that the breast is "traced out" like a stencil, go back to the center cut. Follow the bone and scrape down, pulling the meat away as you go. | It may not look perfect, but no one will see the underside. Take your knife and retrace the outline as needed to lift the meat carefully off. | Here is one side of
the breast removed from the rotisserie. Move to side 2 and repeat these steps. |
||||||
 |
 |
 |
||||||
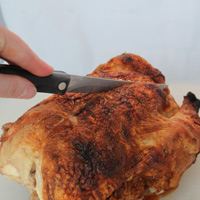
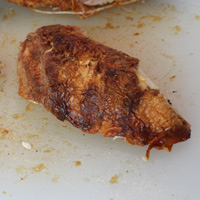
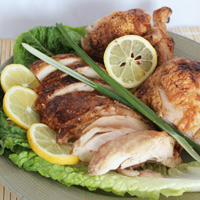
| Cut the meat against the grain. If you cut with the grain, you can tell because it starts to shred and fall apart. It should make a clean cut. | Make sure to keep the skin intact as you slice the chicken for a nicer presentation. (This is where the serrated knife is especially important.) | Arrange the drumsticks and sliced breast meat on a platter with garnish to accompany the meal you are preparing. | ||||||
| The presentation
makes a big difference with chicken because lots of people are skiddish
about chicken on the bone. We're all so used to boneless skinless
manufactured chicken that the real thing kind of freaks us out. Taking
the time to carefully take the meat off the bone and slice it turns a
chicken with questionable "pinkness" into a superstar meal. Now don't
get me wrong. You need to cook your meat thoroughly, but if you
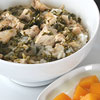
overcook a bird, it becomes dry. Walk that line and own it! A rotisserie chicken is versatile. It's great as a stand alone meal with a great side or tossed in a salad or wrap. I've included some suggestions below. -Sierra |
||||||||
 |
 |
 |
 |
 |
 |
 |
||
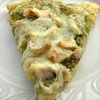
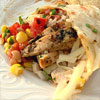
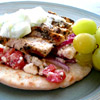
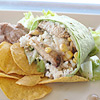
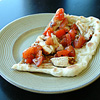
| Mango Chicken Curry | Pesto Pizza | Anniversary Wrap | Chicken Souvlaki | Feta Wrap with Black Bean Hummus |
Perfect Roast Chicken |
Chicken Caprese Pizza | ||
Recipes